First Project with Bambu Lab A1 mini
🛠️ First Project with Bambu Lab A1 mini: ESP32-S3 + Breadboard CAD Modeling
1. Why I Bought the A1 mini
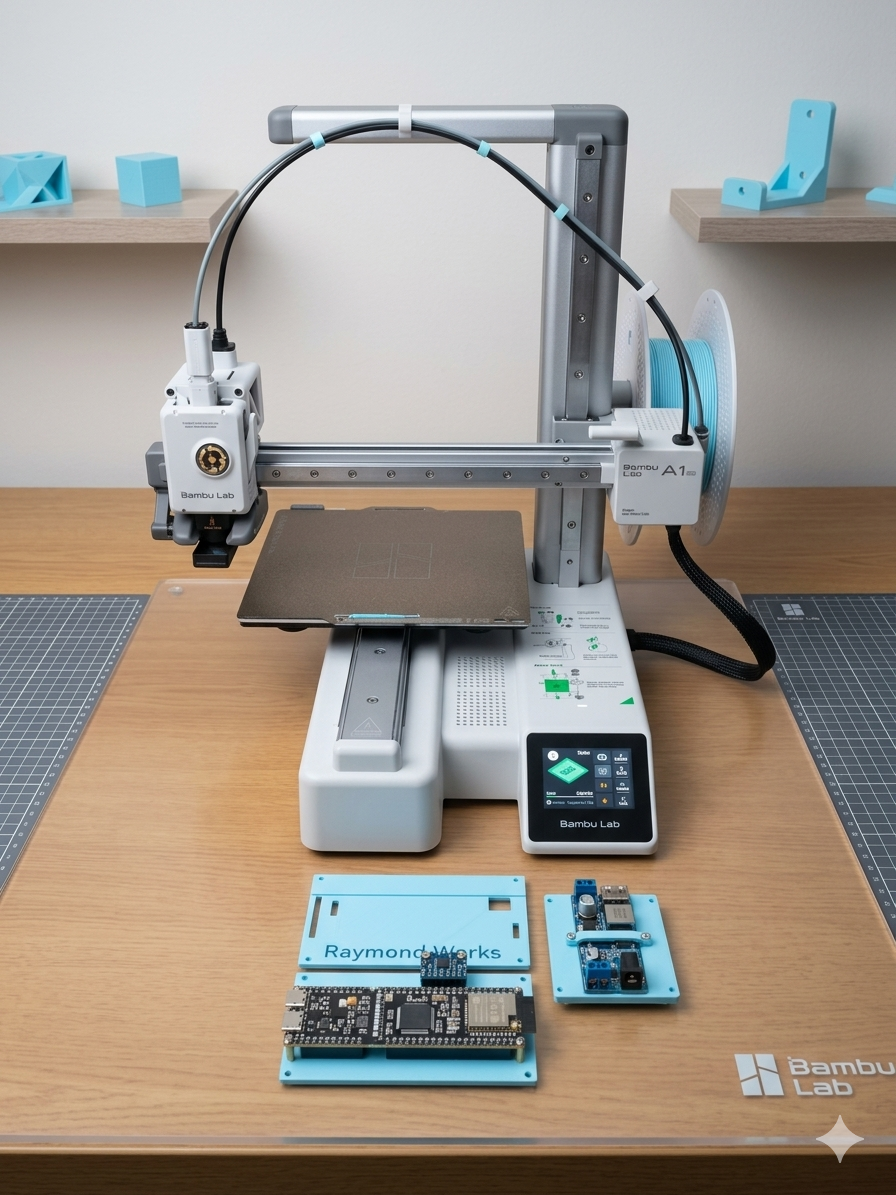
My motivation for purchasing the Bambu Lab A1 mini was to work on an autonomous driving car project using a general-purpose development board. I needed a reliable 3D printer to prototype custom mounts and housings, so the A1 mini became my very first printer.
2. Why ESP32-S3
I chose the ESP32-S3 because it supports micro-ROS, which is essential for robotics and autonomous systems. However, the board is quite wide, and a single breadboard cannot accommodate it. In fact, I had to use two breadboards side by side just to connect jumper wires properly. This made me realize that a custom mounting solution was necessary.
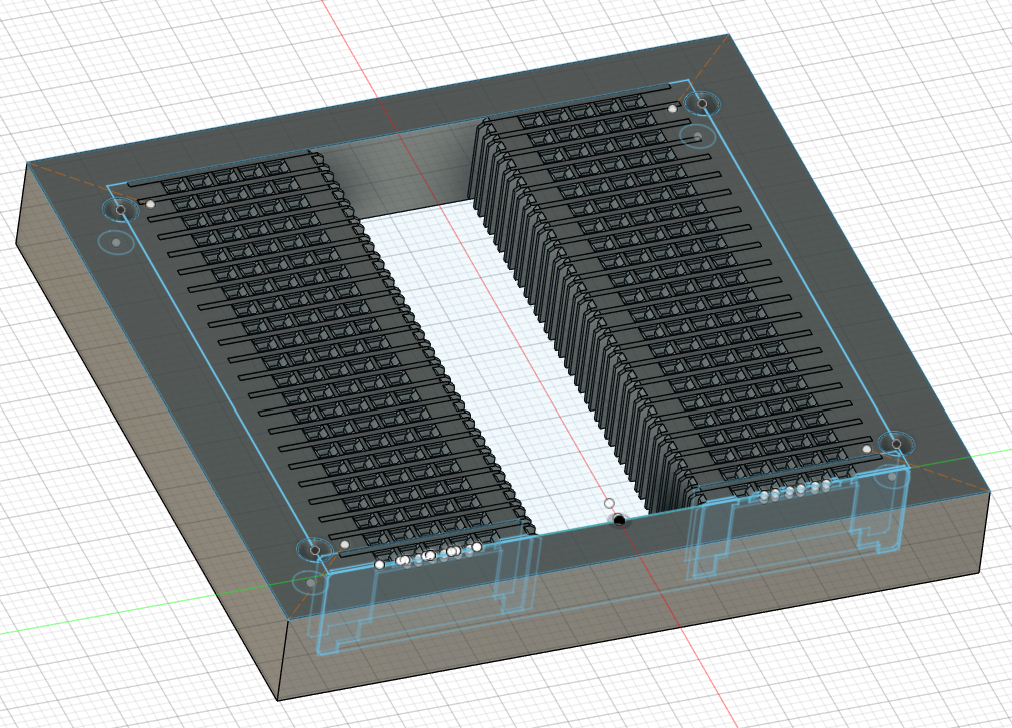
3. CAD Work in Fusion 360
To solve this, I designed a mount in Fusion 360:
- Based on the Raspberry Pi footprint (58 x 49 mm), I drilled holes to match the size.
- Ensured the ESP32-S3 could sit securely while still allowing jumper wire access.
- Considered future sensor connections, such as the MPU6050, so the design would remain expandable.
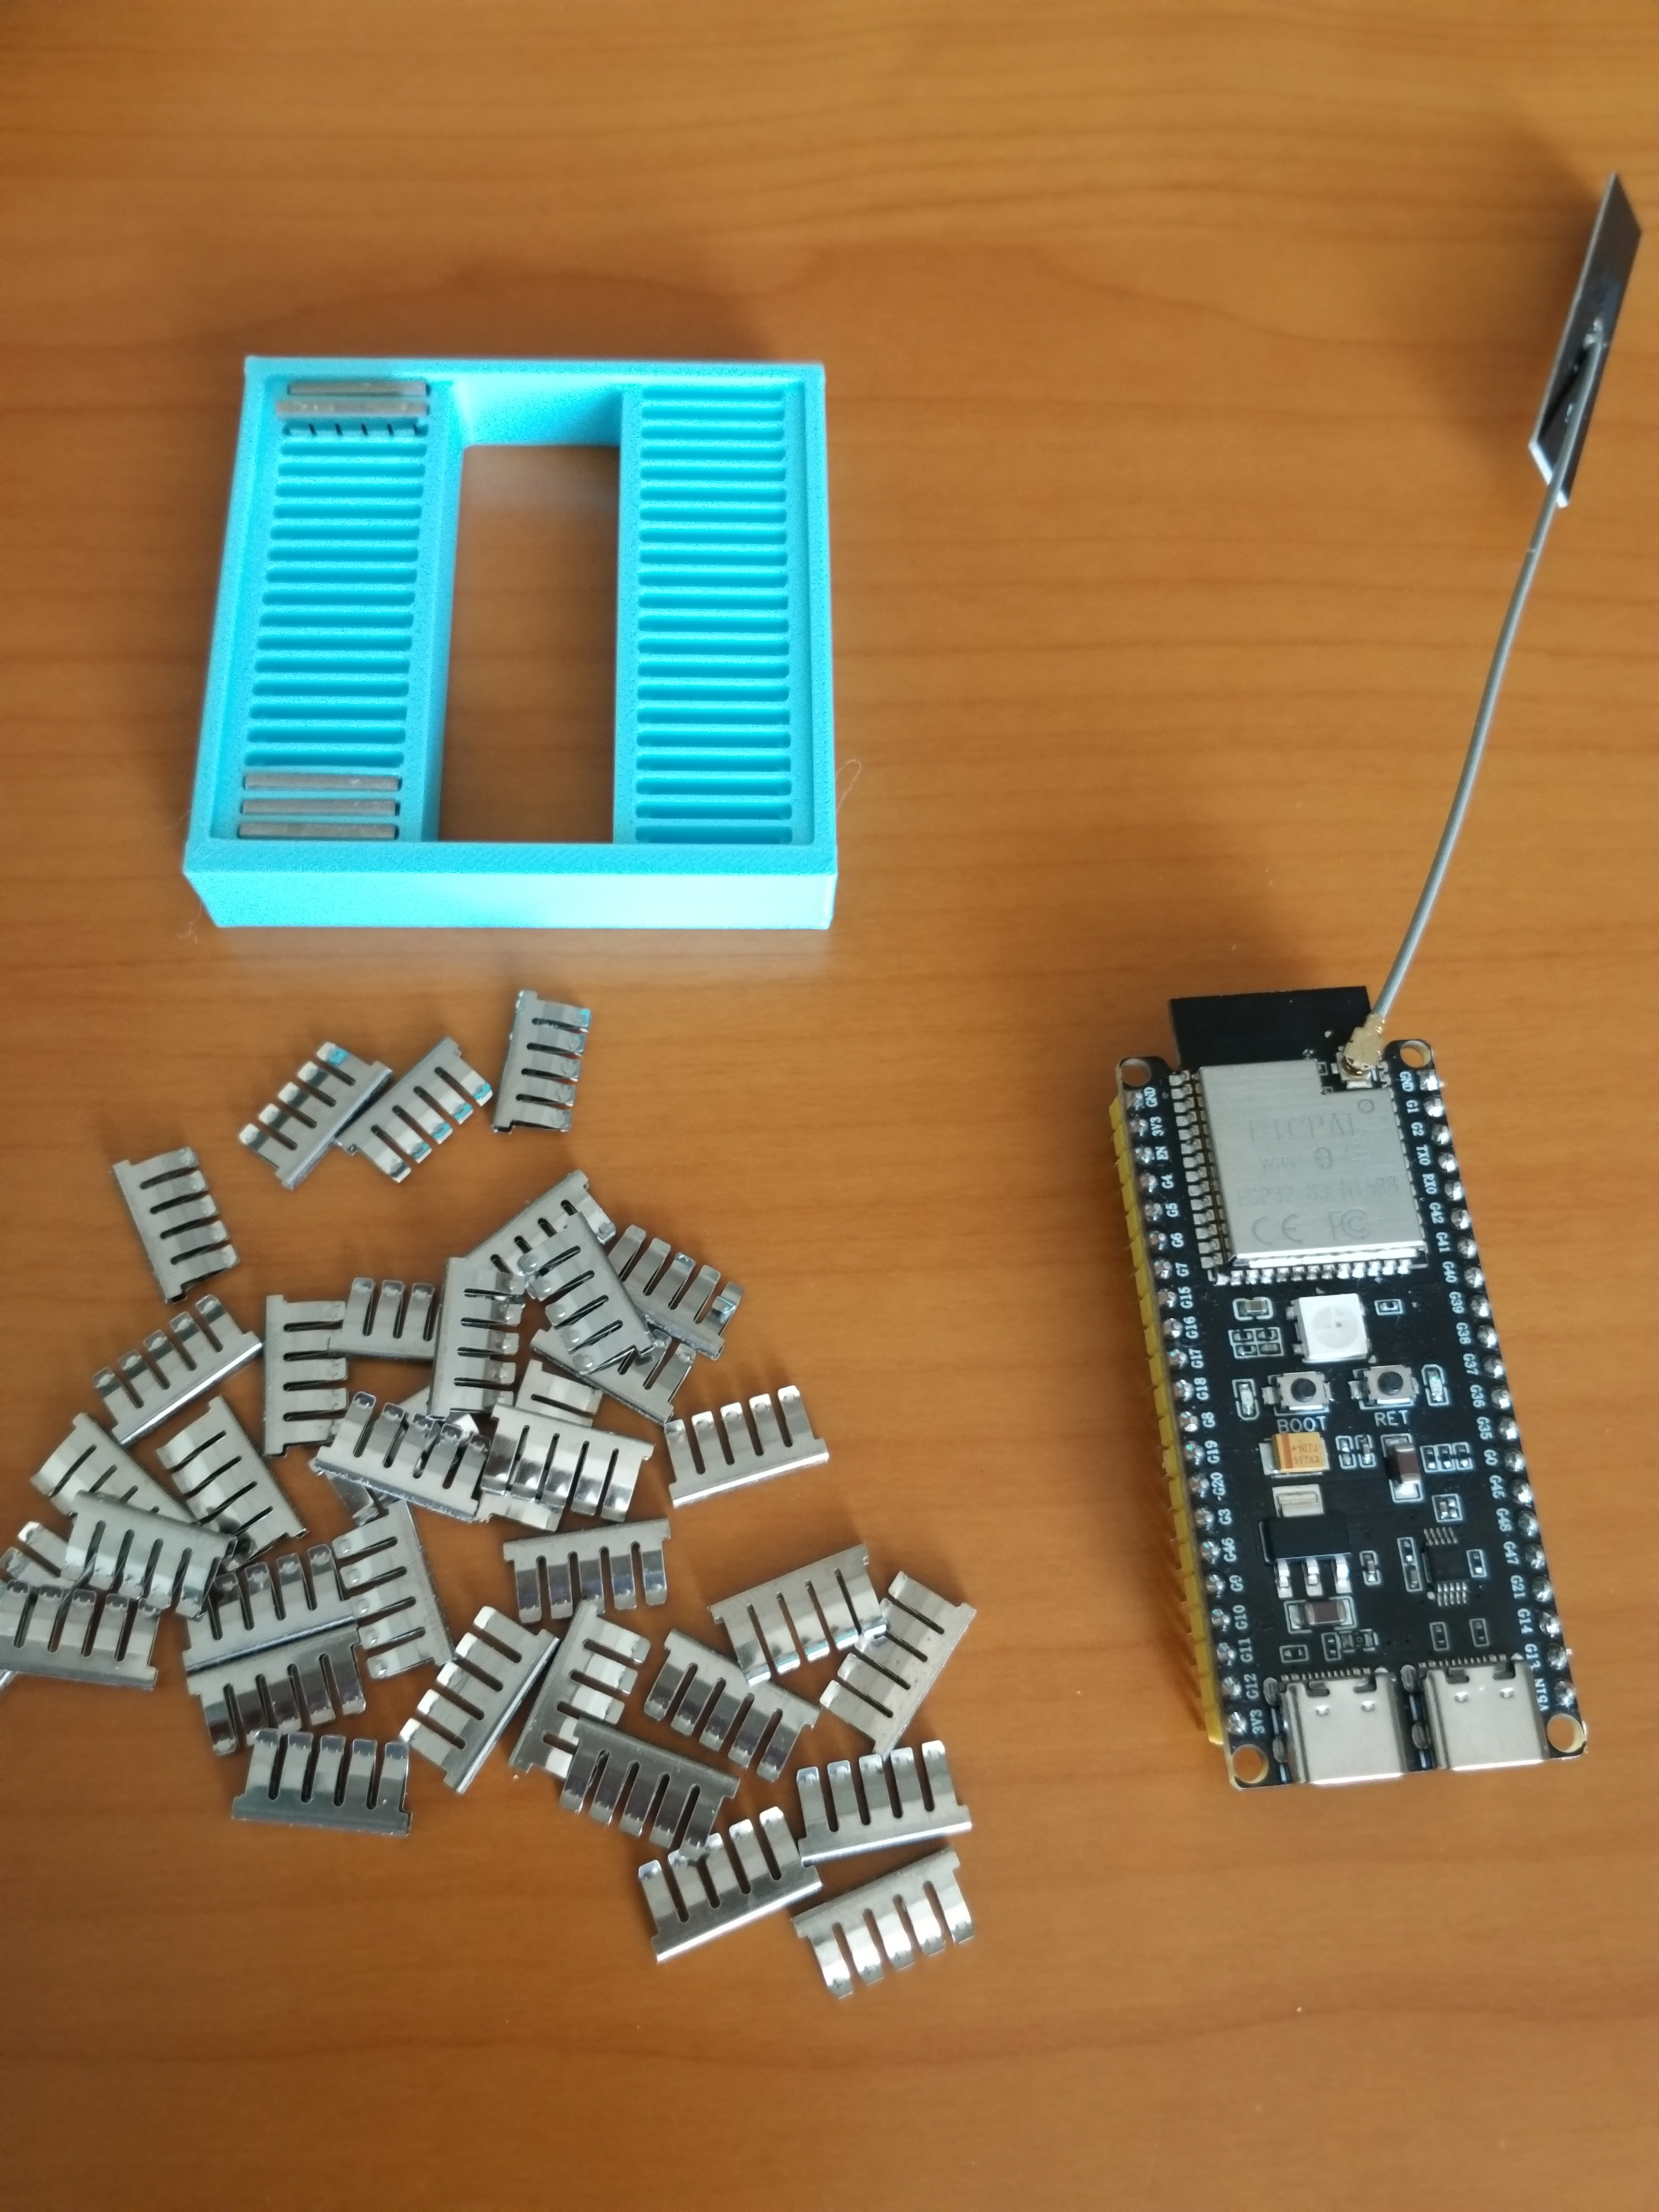
4. Printing Process
- Sliced the model and printed it on the A1 mini.
- Experimented with filament settings and print orientation.
- Captured the printing process and final product for comparison with the CAD design.
5. Reflections
This was my very first 3D printing project, and despite some trial and error, the result was satisfying. Seeing the ESP32-S3 mounted securely on a custom-designed holder gave me a sense of accomplishment.
Looking ahead, I plan to design cases for sensor modules and even chassis parts for the autonomous car project. This first step has opened the door to many exciting possibilities.