Balancing Robot
Balancing Robot
✅ Purpose
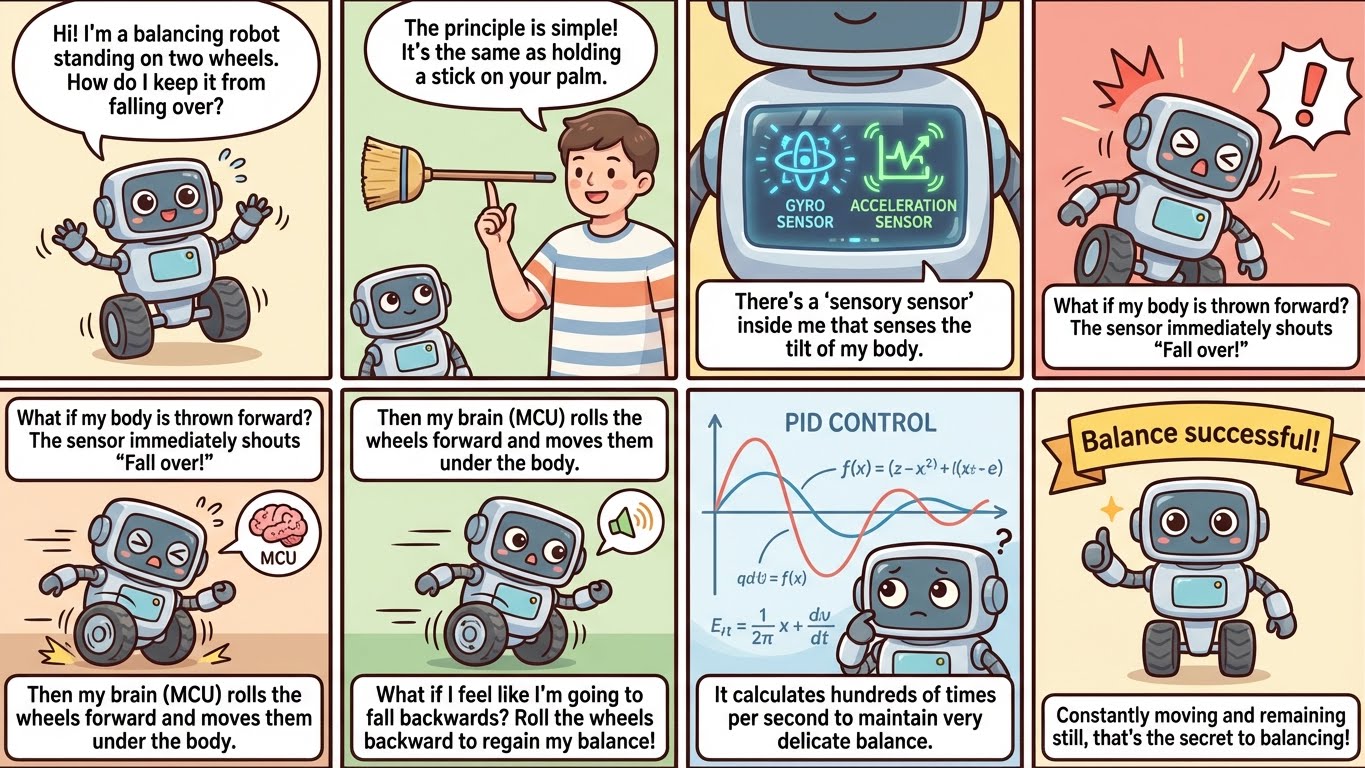
This is a simple example of querying the status of a balancing robot. I used AI to create a cartoon-like image that briefly explains the balancing robot.
The Bluetooth part of Arduino and communication with PC was helped by Vibe coding.
✅ Arduino Source - MPU6050 Sensors
This is the communication part that uses reinforcement learning to control a balancing robot. Of course, the result was a failure. The main reason was latency, but it was still a pretty good result.
1
2
3
4
5
6
7
8
9
10
11
12
13
14
15
16
17
18
19
20
21
22
23
24
25
26
27
28
29
30
31
32
33
34
35
36
37
38
39
40
41
42
43
44
45
46
47
48
49
#include <MPU6050.h>
#include <SoftwareSerial.h>
#include<Wire.h>

#define BT_RXD 4
#define BT_TXD 3
SoftwareSerial hc06(BT_TXD, BT_RXD);

const int MPU_addr=0x68;  // I2C address of the MPU-6050
int16_t AcX,AcY,AcZ,Tmp,GyX,GyY,GyZ;
void setup(){
  Wire.begin();
  Wire.beginTransmission(MPU_addr);
  Wire.write(0x6B);  // PWR_MGMT_1 register
  Wire.write(0);     // set to zero (wakes up the MPU-6050)
  Wire.endTransmission(true);
  Serial.begin(9600);
  hc06.begin(9600);
}
void loop(){
  Wire.beginTransmission(MPU_addr);
  Wire.write(0x3B);  // starting with register 0x3B (ACCEL_XOUT_H)
  Wire.endTransmission(false);
  Wire.requestFrom(MPU_addr,14,true);  // request a total of 14 registers
  AcX=Wire.read()<<8|Wire.read();  // 0x3B (ACCEL_XOUT_H) & 0x3C (ACCEL_XOUT_L)
  AcY=Wire.read()<<8|Wire.read();  // 0x3D (ACCEL_YOUT_H) & 0x3E (ACCEL_YOUT_L)
  AcZ=Wire.read()<<8|Wire.read();  // 0x3F (ACCEL_ZOUT_H) & 0x40 (ACCEL_ZOUT_L)
  Tmp=Wire.read()<<8|Wire.read();  // 0x41 (TEMP_OUT_H) & 0x42 (TEMP_OUT_L)
  GyX=Wire.read()<<8|Wire.read();  // 0x43 (GYRO_XOUT_H) & 0x44 (GYRO_XOUT_L)
  GyY=Wire.read()<<8|Wire.read();  // 0x45 (GYRO_YOUT_H) & 0x46 (GYRO_YOUT_L)
  GyZ=Wire.read()<<8|Wire.read();  // 0x47 (GYRO_ZOUT_H) & 0x48 (GYRO_ZOUT_L)

  if (hc06.available()) {
    hc06.print(">");
    hc06.print(AcX);
    hc06.print(",");
    hc06.print(AcZ);
    hc06.print(",");
    hc06.print(GyX);
    hc06.print(",");
    hc06.print(GyY);
    hc06.print(",");
    hc06.print(GyZ);
    hc06.print("<");
    hc06.flush();
  }

  delay(333);
}
✅Python Receiver, GUI
I asked the AI to give me Python code with a simple UI, and it came out like this:
1
2
3
4
5
6
7
8
9
10
11
12
13
14
15
16
17
18
19
20
21
22
23
24
25
26
27
28
29
30
31
32
33
34
35
36
37
38
39
40
41
42
43
44
45
46
47
48
49
50
51
52
53
54
55
56
57
58
59
60
61
62
63
64
import tkinter as tk
from tkinter import ttk
import bluetooth
import threading

class BluetoothGUI:
    def __init__(self, root):
        self.root = root
        self.root.title("Bluetooth Sensor Monitor")

        # Simple Label Creation
        self.labels = []
        for i in range(5):
            label = ttk.Label(root, text=f"Sensor {i+1}: ---", font=("Arial", 14))
            label.pack(pady=5)
            self.labels.append(label)

        # Bluetooth Thread
        self.running = True
        self.thread = threading.Thread(target=self.bluetooth_connect, daemon=True)
        self.thread.start()

    def update_labels(self, values):
        for i in range(min(5, len(values))):
            self.labels[i].config(text=f"Sensor {i+1}: {values[i]}")

    def parse_packet(self, packet):
        try:
            values = list(map(int, packet.strip().split(',')))
            self.root.after(0, self.update_labels, values)
        except ValueError:
            pass  # First Packet or Abnormal Packet

    def bluetooth_connect(self):
        server_mac = "98:D3:61:F9:44:A1"
        port = 1
        server_sock = bluetooth.BluetoothSocket()
        server_sock.connect((server_mac, port))

        buffer = ''
        receiving = False

        try:
            while self.running:
                data = server_sock.recv(50).decode(errors='ignore')
                for char in data:
                    if char == '>':  # STX
                        buffer = ''
                        receiving = True
                    elif char == '<':  # ETX
                        receiving = False
                        self.parse_packet(buffer)
                    elif receiving:
                        buffer += char
        except OSError:
            print("Bluetooth connection closed.")
        finally:
            server_sock.close()

# GUI Run
root = tk.Tk()
app = BluetoothGUI(root)
root.mainloop()
🎞️ Short Promotional Clip
This is a video clip of the balancing robot I bought made with Veo.

This post is licensed under CC BY 4.0 by the author.